This article describes the old Extraction Validation interface, which will eventually be replaced by an updated version that is already available in beta.
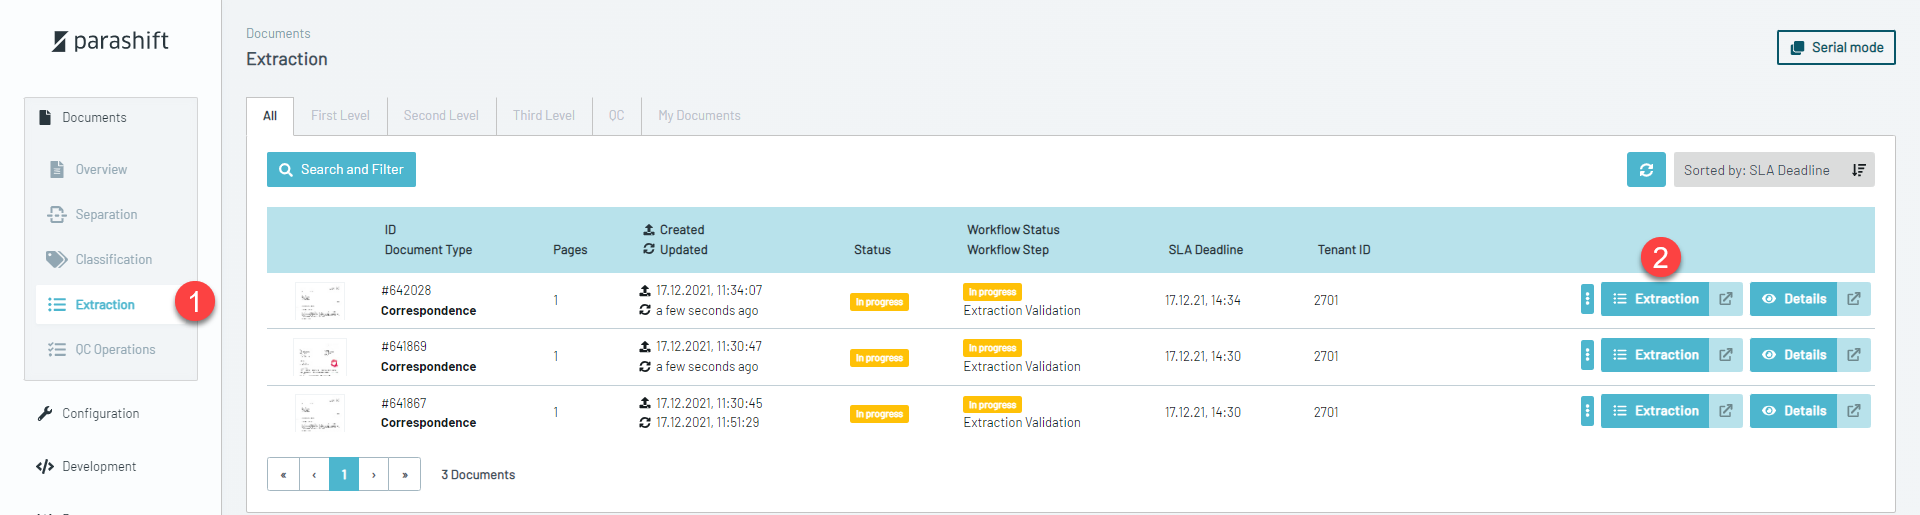
After uploading a document, our automatic extraction process captures as much information as possible. Once this process finishes, the document will appear in the Extraction Overview (1), where you can open the Extraction Validation via the blue Extraction button (2).
In Extraction Validation, you can navigate through all pages of the document on the left side:
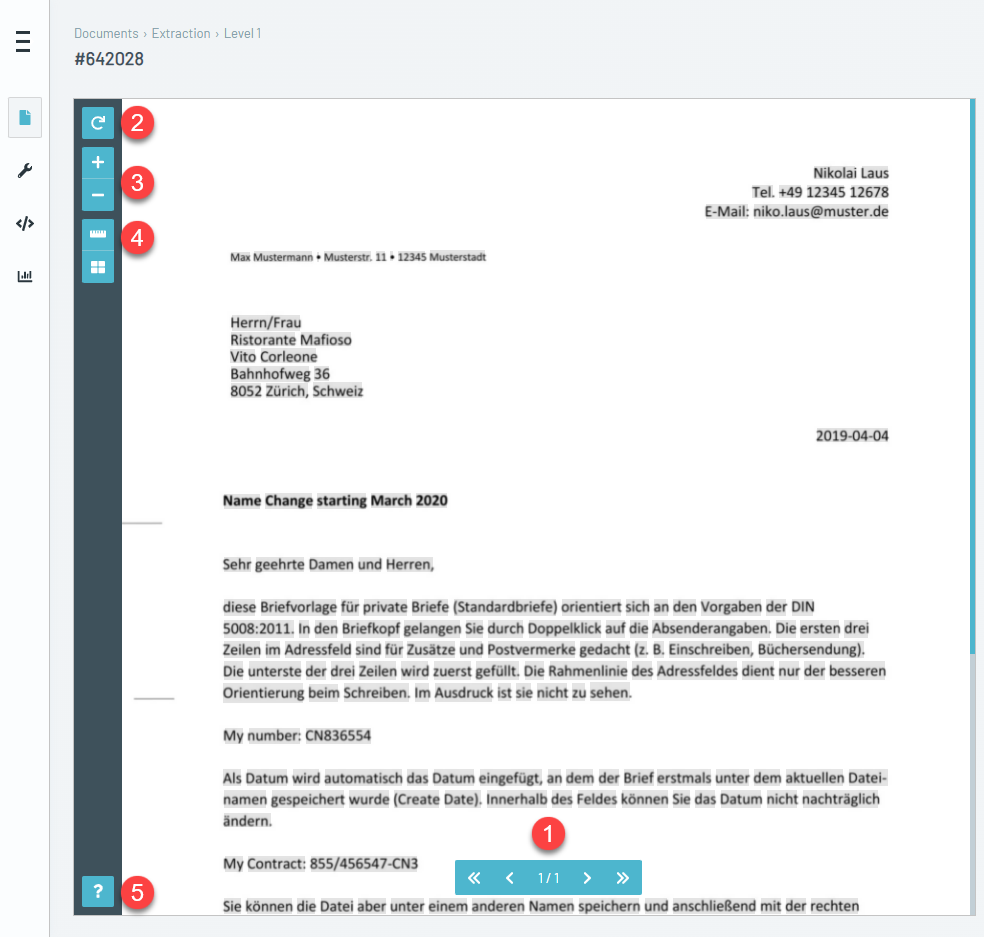
- Page Navigation – Skim through pages or jump to the beginning or end of your document.
- Rotation – If our preprocessing didn’t rotate your document correctly, you can rotate it manually.
- Zoom In/Out – Zoom in or out to get a closer look at your document.
- Ruler – If you’re validating pages full of line items, the ruler helps you keep track of your position.
- Help – Access a list of shortcuts to features that come in handy when validating.
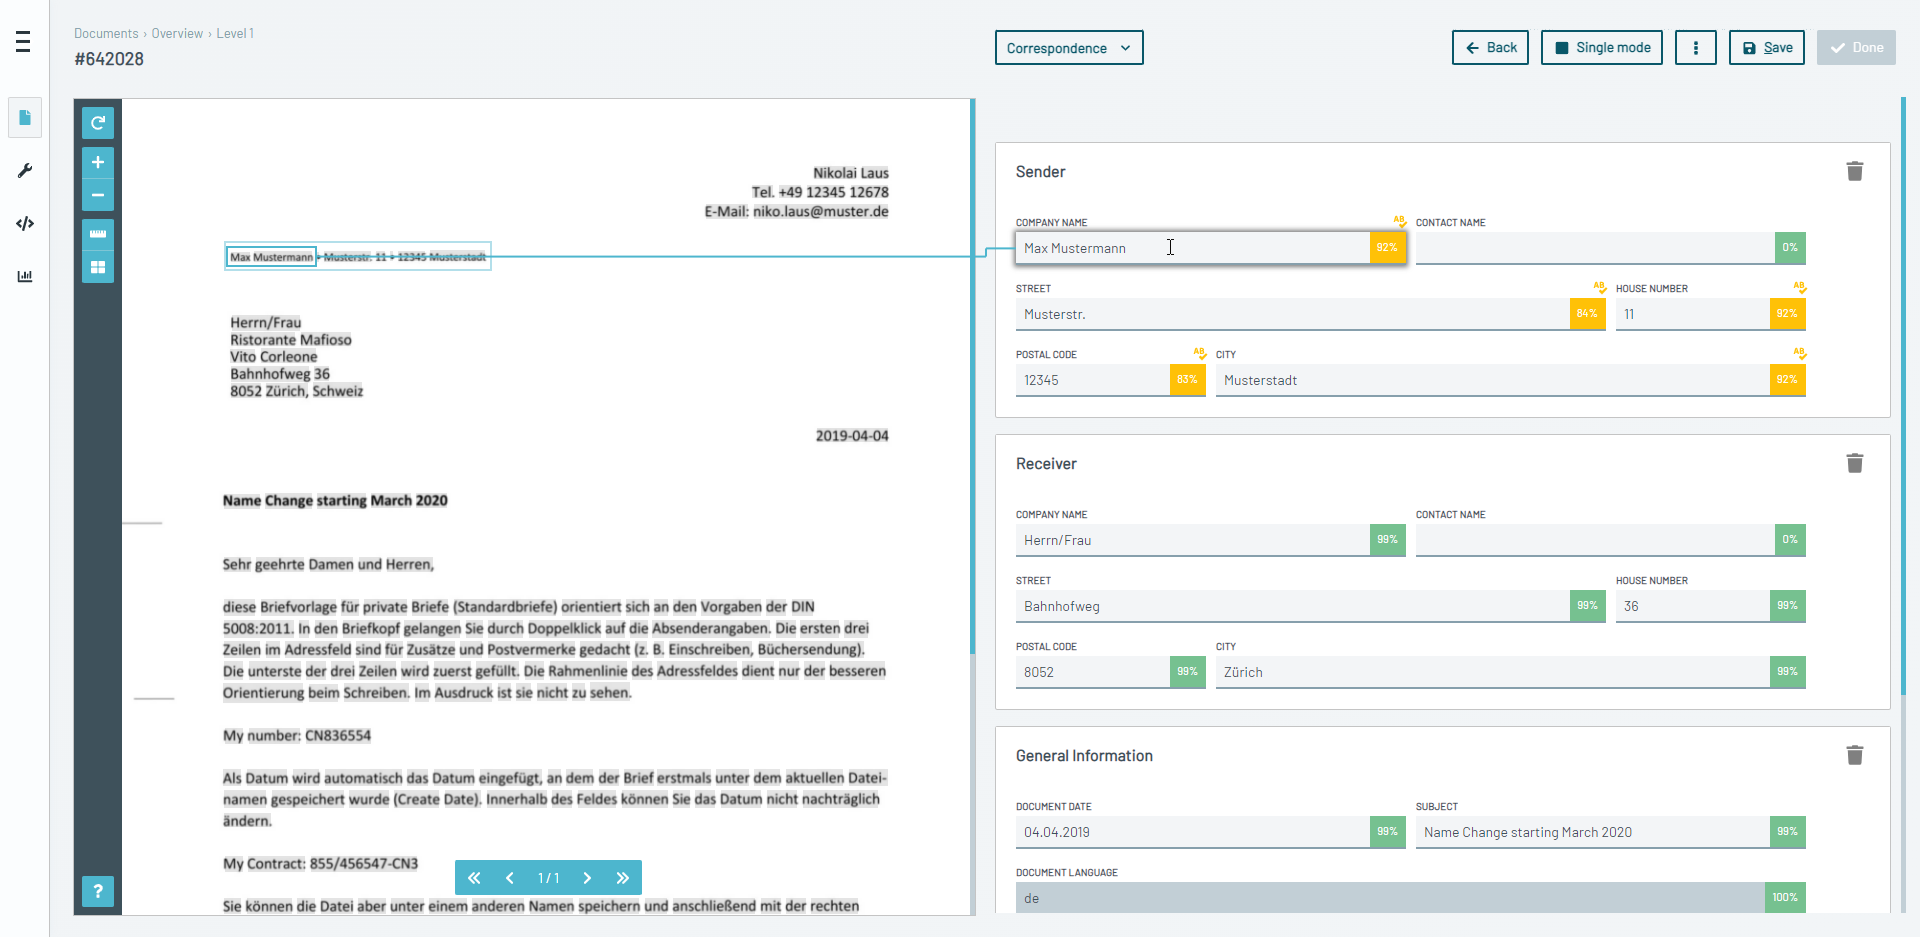
On the right side, you’ll find all fields that belong to the document type your document has been processed with. The colored box and its value indicate how confident our “machine” is in its prediction:
- Green (100–95%) – High confidence; no manual confirmation is required.
- Yellow (95–30%) – Predictions are entered into each field but must be confirmed manually.
- Red (30–0%) – Predictions are not entered; manual capture or confirmation is required.
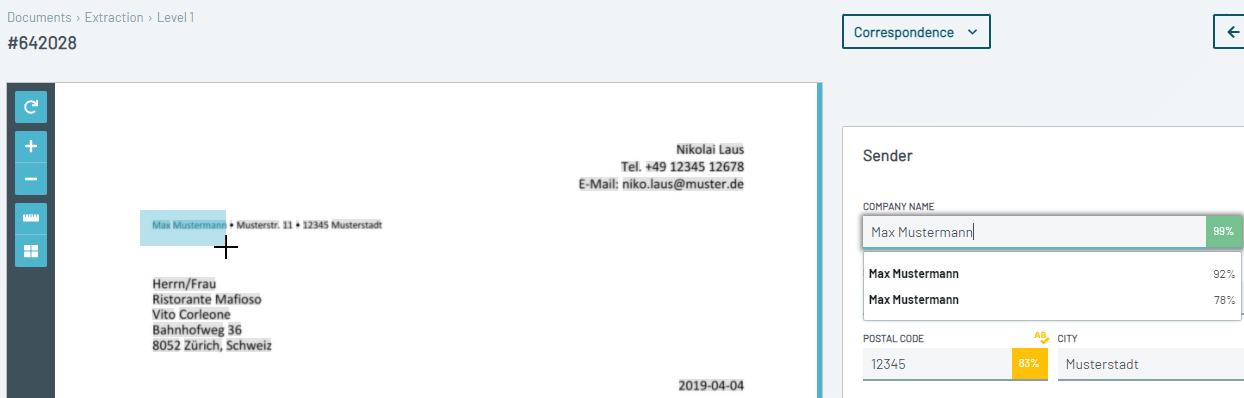
To add any value to a field, a connection to the document is needed. You create this connection by drawing a box around the corresponding value on the document. This captures the coordinates of the value, which is vital for our machine learning models.
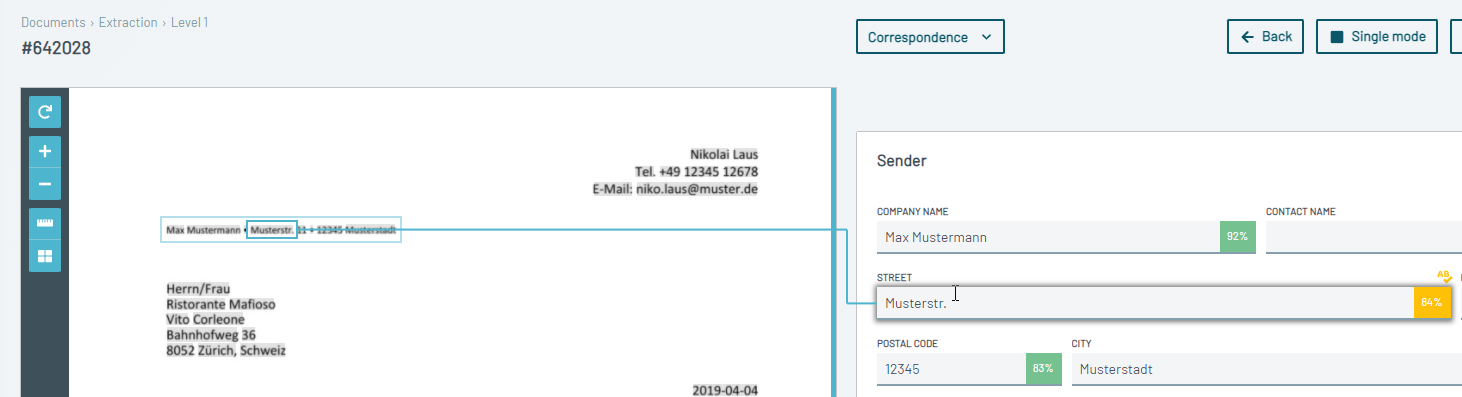
If a prediction or validated value is present in a field, you can hover over the field to see where it was found. A blue line will highlight the validated value on the document and that value will have a blue outline.

Depending on the document type configuration, some fields or fieldsets can be captured multiple times by clicking “Add Item” (1). In the example below, a fieldset of two fields (FIELD 1 & FIELD 2) has been added three times. These fieldsets can be rearranged (2) or removed (3).
Once all fields have been validated (green), the Done button becomes available, and you can finish processing your document.
